The modern business landscape urgently requires innovations and agile approaches to all customer-facing processes so CRM appeared as a blessing resort. In the modern CRM market, there are many options for any business and budget (Act!, monday.com, Pipedrive, Maximizer) In the avalanche of various solutions, you have chosen Bitrix24 as the most practical and tool-rich option. So you transferred your data to Bitrix24 successfully and everything in proper places, but what to do next? Currently, you are facing a challenging issue of Bitrix24 setting up. They say that tool prevails its master with the knowledge of how it should be handled while the master has only an approximate idea. Hence, the following life hacks will help you to overcome the burning tasks effectively.
[Related Article: The Best Marketing Automation Software & Platform]
Users
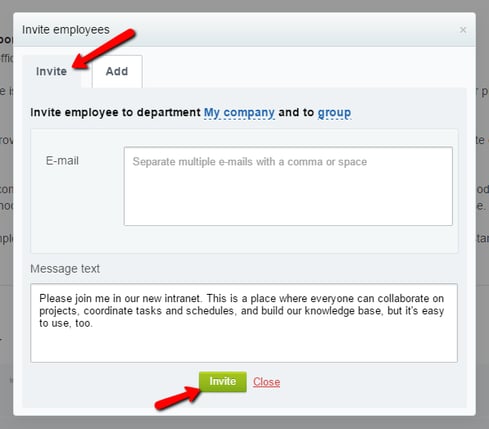
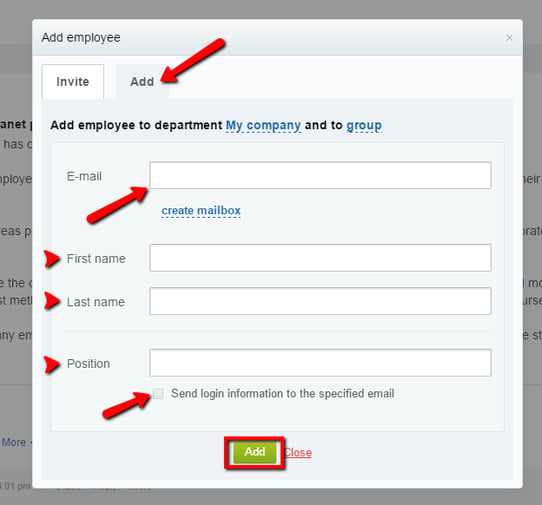
Once you have registered an account at www.bitrix24.com, the provided email owner acquires a maximum of administration possibilities in CRM. This portal administrator function can be reassigned to another user. Other users can be granted limited access permissions later by a portal administrator. The Bitrix24 setting up should be started by adding your employees into the CRM. So, the Bitrix24 client portal can engage his/her team in 2 ways:
- You can send an invitation providing the email addresses. After you hit the button ‘Send’, your employees will get the message with a link for entering into Bitrix24.
- You can add employees by yourself. You have to enter his email address, first and last names, and position. By pushing the ‘Add’ button, the notification will be sent to the email address you provided.
The portal administrator can edit a user profile and enable access to the system by providing administrative access.
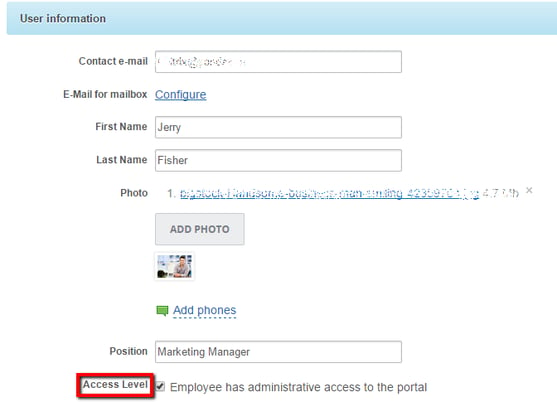
To activate this option, the user should click on the ‘admin mode’ in the Action box of his/her profile.

You can dismiss the existing user by clicking on the ‘Dismiss’ button in his/her profile. This user becomes inactive and he/she has no access to the company portal. But all the records owned by him/her are still in the system.
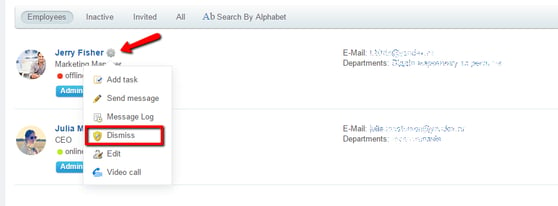
You can’t delete this user physically, but you can active this employee anytime. Go the
Company > Employees > Inactive, then click on the button near the name and hit the ‘hire’.

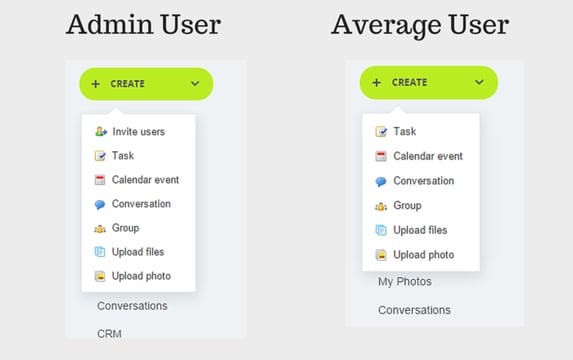
Within a company, the abilities of a Bitrix24 customer portal and an average user differ in the following aspects:
Workgroups and User Types
Both user types can create workgroups, but the admin can setup a moderator of the workgroup, as well as allow or restrict the option of inviting other users into this very group.
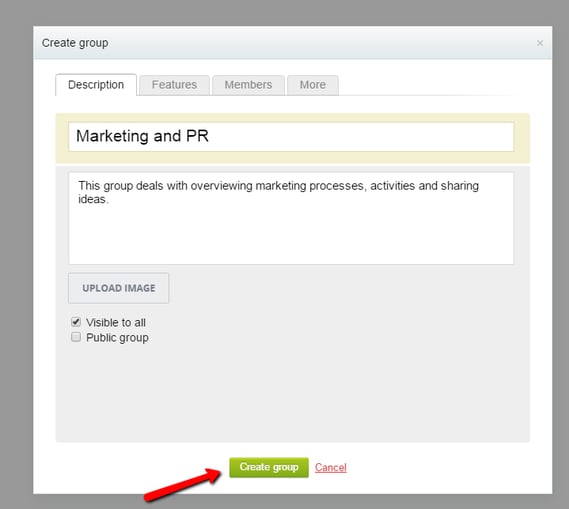
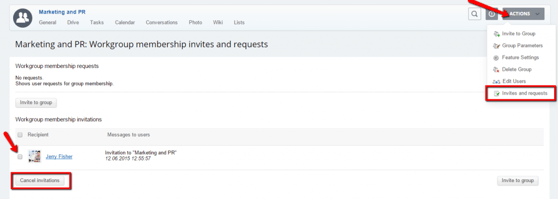
The invitation to the workgroups can be called back by the administrator or the user that sent the invitation. Go the workgroup, then click on the “Actions” and select “Invites and Requests”.

Then choose the employee (by ticking the box) and cancel/invite into the group.
The workgroup can be modified by the portal admin, group owner, and/or moderator (chosen by the administrator). The member of the workgroup and the group itself can be deleted by the administrator or owner.
Bitrix24 Gmail Integration
Bitrix24 provides the ability to create a new mailbox on bitrix24.com, attach your domain or integrate with an external mail service. To integrate your mailbox, you click on your profile name in the right upper corner of the page layout and select Bitrix24 email integration options.
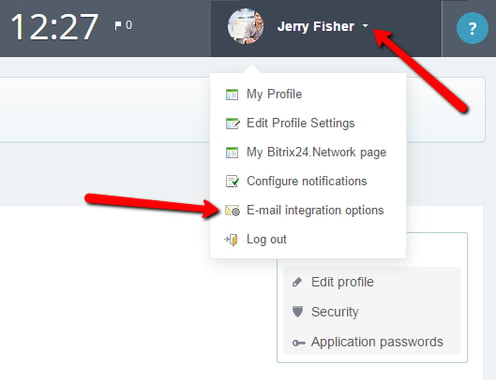
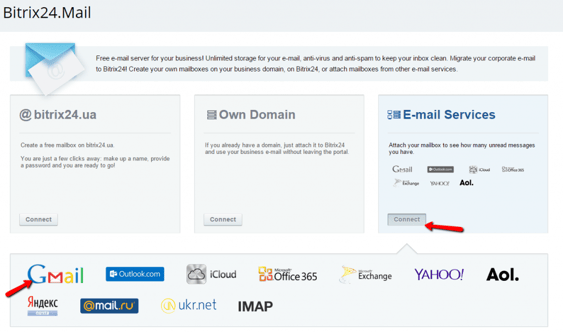
Then you need to select what type of mailbox you want: bitrix24.com mailbox, attachment of your domain, or integration with external service. Let’s say we want to integrate a Gmail box with Bitrix24. Select E-mail services > Gmail.
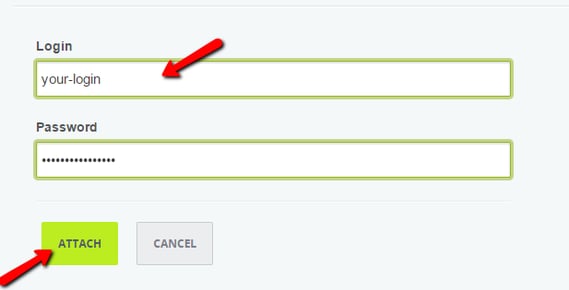
Then you will have to fill in your Bitrix24 login portal, a password and click on the ‘Attach’ button.
In case, your access credentials are correct, you will see such a notification.
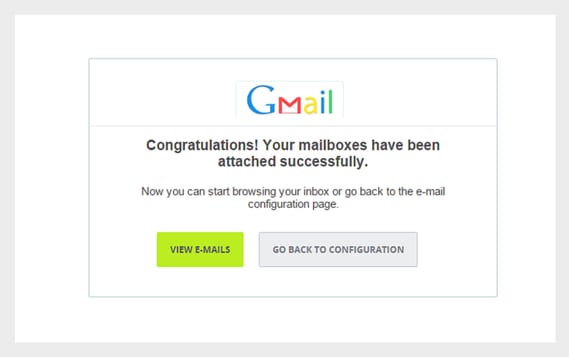
If you hit ‘View E-mails“, you will be redirected to your Gmail box for activating Bitrix24 Gmail integration. To continue work with Bitrix24 you should click on ‘Go back to configuration’.
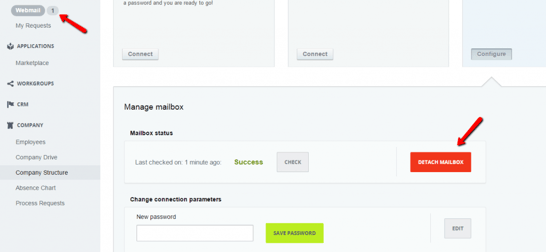
The number of your emails will be shown in the ‘My Workspace’ tab, near Webmail. The mailbox can be edited and detached. But you can have only 1 mailbox attached to your profile.
Calendar Integration
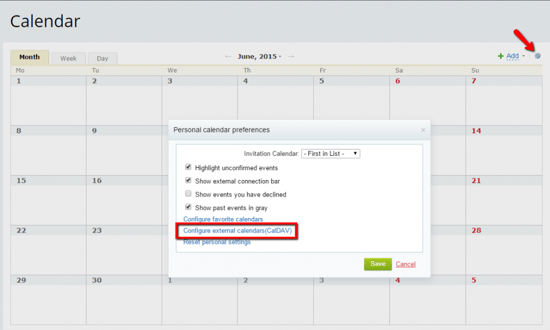
You don’t need to run different calendars at the same time. Bitrix24 provides an option of calendars assimilation. To add another calendar to Bitrix24, you should go to My Working Space > Calendar. Then hit the icon in the upper right corner and choose “Configure external calendars (CalDAV)”.
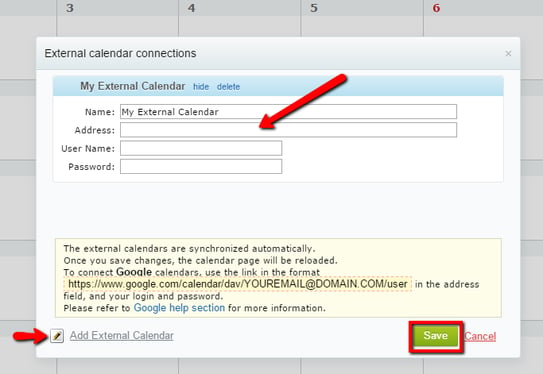
The next step is naming your calendar, providing its address (URL of the calendar), user name, and password. If you want to configure one more calendar, click on the “Add the external Calendar” button in the left corner. And add the second calendar, then press “
Save” button. The calendars are synchronized automatically. So you need just reload the page. Thus, if you want to configure a Gmail calendar, you need to enter the link in
the next way: https://www.google.com/calendar/dav/your-@domain.com/user.
Docs And Bitrix24 Drive Management
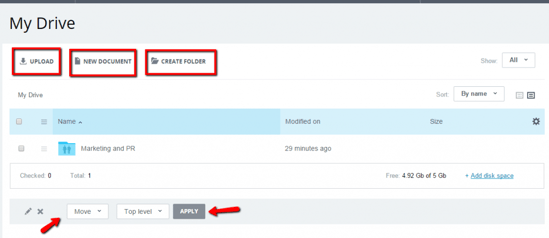
The CRM you had installed offers you the ability of document storage and creation. But you also can import documents from your computer.
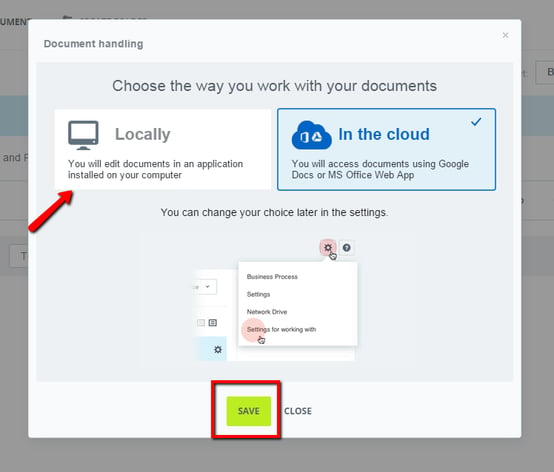
You can select the mode in which you are going to work with the documents: locally – in the apps of your computer or in the cloud – by accessing with Google Docs or Web App. These settings can be changed at any time.
Bitrix24 User Permissions and Access
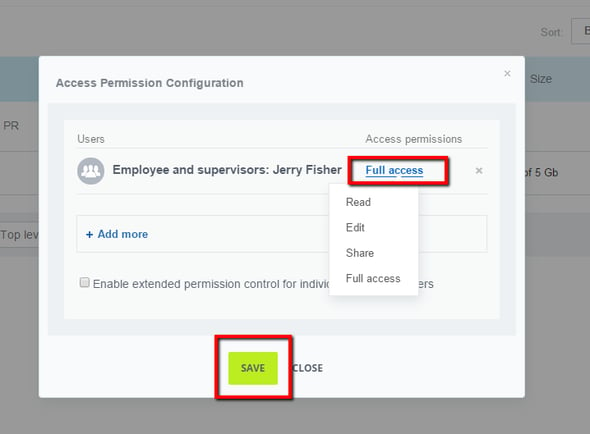
To assign the access or editing Bitrix24 access permissions to other users, you need to go to the
My Dive > Settings (in the right upper corner) > Assign Bitrix24 user permissions.

You can choose employees, as well as the access rights – read, edit, share, or full access – to other users. And then hit the button “Save”.
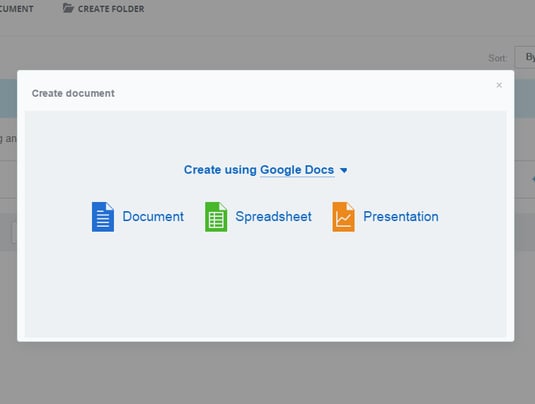
If you want to create a new document in Google Docs, you should choose type – document, spreadsheet, or presentation.
Bitrix24 will require permission to access your Google account, so you need to click on the ‘Allow’ button. To edit the uploaded document, you need to click on the field near the Docs icon and select “Open”.
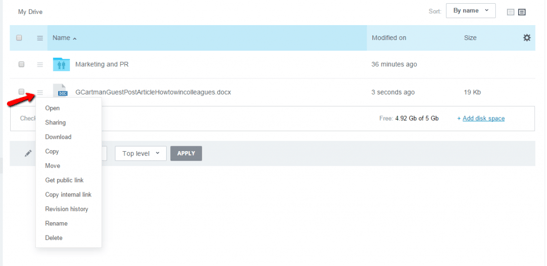
Then you can choose where you want to edit your Document – in Google Docs,
Ms. Office Online or on your computer.

As you can see, the Bitrix24 setting up of user abilities is multiple. The next part of posts devoted to configuring your new CRM will describe how to manage reports and sales funnels. Stay in the loop with our blog for getting more useful tips for a successful Bitrix24 setting up.

.png?width=140&height=140&name=Noah%20(1000%20x%201000%20px).png)


(2).jpg)
