It’s possible to activate or deactivate validation rules before migration to Salesforce on both Salesforce Classic and Lightning Experience platforms.
Note: Available in Essentials, Contact Manager, Group, Professional, Enterprise, Performance, Unlimited, Developer, and Database.com Editions.
Note: To define, change field validation rules, or view field validation rules you need to have Customize Application user permissions.
So, to deactivate validation rules before migration to Salesforce, go through the following steps:
1. From the Setup, go to Object Manager and choose the relevant object
2. In the left sidebar, click Validation Rules.
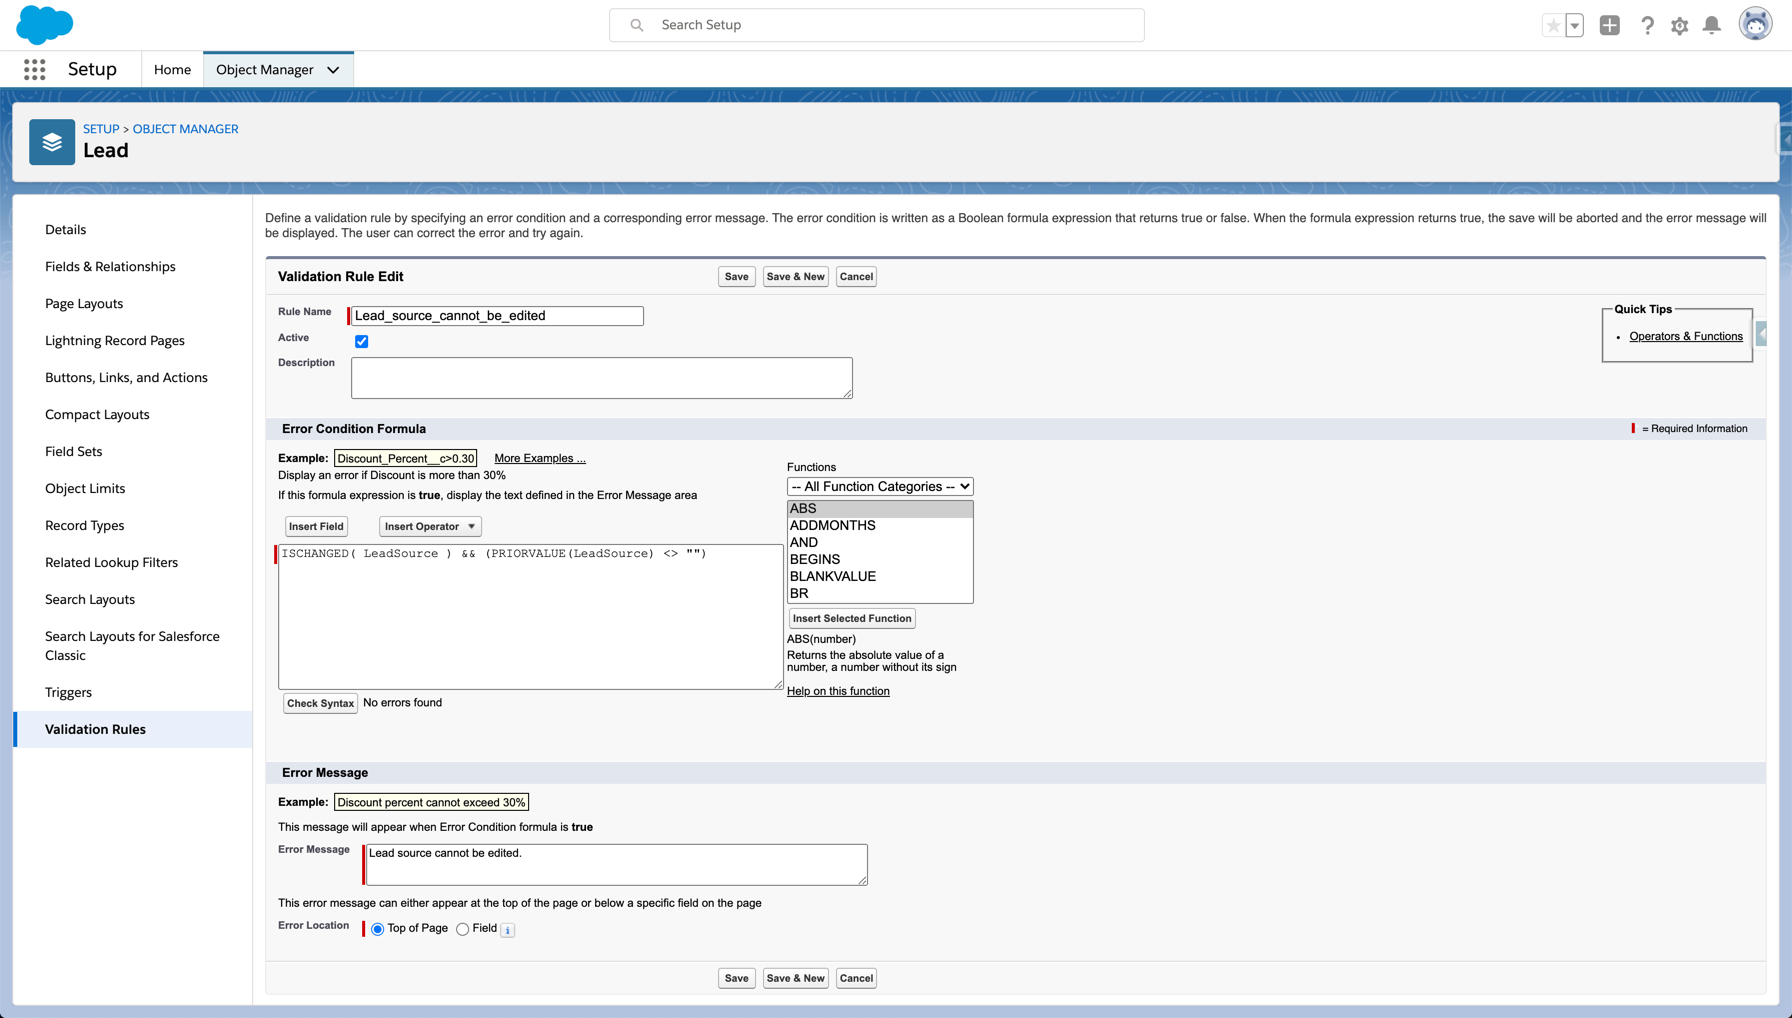
3. Click “Edit” from the drop-down menu.

4. To deactivate the rule, deselect Active, and save your changes.